A Beginner's Guide to Hug SCM: Your Friendly Programming Time Machine
Welcome to the world of programming! As you start building your own programming projects, you'll find that keeping track of changes can be challenging. What if you delete something important? What if you want to go back to an earlier version that worked?
This is where Hug SCM comes in. It's a tool that helps you manage your code, much like a "save" button on steroids or a time machine for your projects. This guide will walk you through the essentials of Hug using simple terms and analogies, empowering you to experiment fearlessly.
Why Do You Need a "Time Machine"?
Imagine you're writing a story. You might save different versions like story_v1.txt, story_v2.txt, and story_final_I_swear.txt. This gets messy fast.
Version control automates this process. It allows you to easily take snapshots of your project at different points in time, allowing you to go back to any "save point" you've made.
Your Programming Laboratory
For this guide, let's use the analogy of a large, high-tech laboratory facility where you conduct your programming experiments.
Hug is the automated system that manages this lab for you, keeping your work safe and organized.
Setting Up Your Lab
First, you need to get your lab ready. You only have to do this once.
- Install Hug: Follow the simple steps in our Installation Guide.
- Introduce Yourself: After installing, open your terminal and tell Hug who you are. This name will be stamped on every "save point" you create.shell
hug config --global user.name "Your Name"
hug config --global user.email "youremail@example.com"
Your First Experiment: The Core Workflow
This is the simple, repeatable process you'll use every day to save your work.
Step 1: Create Your Lab Facility (hug init)
You have a new project idea, which means you need a place to work. In our analogy, hug init (Initialize) gives you a big, empty laboratory facility for your project.
The hug init command initializes a new Git repository in your project folder. A repository (or "repo") is essentially your project's dedicated lab facility (with multiple lab rooms), containing all your files and the entire history of their changes.
To create your lab facility, navigate to your project's folder in the terminal and type:
hug initThis creates a hidden .git folder, which is the "control center" of your facility where all the history is stored.
Step 2: Do Your Work (The Lab Table)
Now that you have your lab facility, where do you actually do the work? The folder on your computer where your project files are located is your working directory.
Lab Analogy
Think of your working directory as the main lab table in your current lab room. It’s where you have all your files - your experiments - laid out in front of you.
You can edit them, add new ones, and delete old ones freely. This is your live, hands-on workspace. Any changes you make here are "live," but they haven't been officially recorded by Hug's security cameras yet.
Let's create a file:
echo "Hello, World!" > hello.txtStep 3: Check Your Progress (hug s)
How do you know what you've changed? Ask your lab assistant for a status report.
hug slhug sl (Status + List changes) gives you a quick, colorful summary of what's going on in your lab. It will tell you about any new or modified files on your lab table.
Example: 
Step 4: Prepare Your Snapshot (hug aa)
Before creating a permanent save point, you need to tell your lab assistant what to include. This is called "staging".
- Lab Analogy: The staging area is your lab's preparation counter. You move the finished parts of your experiment from the main lab table to this counter, getting them ready to be officially recorded.
The easiest way to do this is with hug aa:
hug aahug aa (Add All) moves all the changes from your lab table to the preparation counter.
Now's a good time to try the hug sl (Status + List) command to get the status line plus a list of changed files.

Step 5: Create a Save Point (hug c)
Once your changes are on the "preparation counter," you can create a permanent snapshot, called a commit.
Lab Analogy
A commit is like a labeled moment in your lab's security camera recording.
It's a snapshot of your project, frozen in time, with a descriptive message.
hug c -m "Created my first file"hug c (Commit) takes everything on the preparation counter and saves it to your project's history. The message is crucial - it's the note you're leaving for your future self!

The Loop
That's it! Your daily workflow is a simple loop, similar to the examples below:
Change, Add to staging, Commit
- Make changes to your code.
- Check your work with
hug sl(optional). - Stage everything with
hug aa. - Save your progress with
hug c -m "Describe what you did".
Change Existing File, Commit
- Make changes to an existing file.
- Check your work with
hug sl(optional). - Stage & Save your progress with
hug ca -m "Describe what you did".cais for Commit All tracked files
Create New File, Commit
- Make changes to an existing file.
- Check your work with
hug sla(optional).slais for Sstatus + List All.
- Stage & Save your progress with
hug caa -m "Describe what you did".caais for Commit All tracked And untracked files
Other Possibilities
TIP
To learn other possible ways to add files to the staging area and to commit your changes, see:
Experimenting Safely with Separate Lab Rooms (Branches)
What if you want to try a new, risky idea without messing up your main project? You can create a new branch.
Lab Analogy
A branch is like a separate lab room. You can make a huge mess in there, and it won't affect the clean, stable work in your main room.
1. Create and Enter a New Room (hug bc)
Let's create a branch to test a new feature.
hug bc new-ideahug bc (Branch: Create) does two things: it creates a new lab room called new-idea and immediately moves you inside it.

2. Work in Your New Room
Now you're in the new-idea room. You can make changes, stage them, and commit them, just like before. This history is completely separate from your main work.
echo "A brilliant new idea!" > idea.txt
hug a idea.txt
hug c -m "Add my new idea"
3. Return to the Main Room (hug b)
To go back to your main, stable project, just switch back to the main branch.
hug b mainhug b (Branch) switches you between lab rooms. Notice that idea.txt has vanished from your lab table! It's safely stored in the new-idea room, waiting for you.

TIP
Execute hug b without passing a branch name to get an interactive menu showing you all available branches.
4. Merge Your Discovery (hug m)
If your experiment was a success, you can bring the changes from your experimental room into your main room. This is called a merge.
# Make sure you are in the main room first
hug b main

# Now, merge the work from the other room
hug m new-idea # This brings in the changes from that branch
hug c -m "Incorporate the new idea"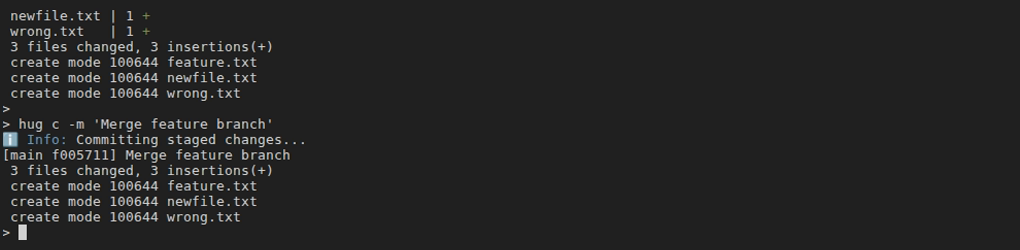
TIP
Learn more about m* commands and the WIP workflow
Your Ultimate Safety Net: Handling Interruptions & Mistakes
Hug makes it safe to fix common mistakes and handle interruptions without losing your progress.
Interruption: "I need to switch tasks, but my work isn't ready to commit!"
- Solution: Use Hug's WIP (Work-In-Progress) workflow. This is a safer, more robust alternative to the confusing "stash" feature found in other tools.
hug wip(Work In Progress) parks all your changes on a temporary, real branch, keeping your working directory clean (free from uncommitted changes). - shell
hug wip "Pausing work on the login form"
When you're ready to return, `hug w unwip` (**Un**park **WIP**) will bring your changes right back. - - Solution: Use Hug's WIP (Work-In-Progress) workflow. This is a safer, more robust alternative to the confusing "stash" feature found in other tools.
Mistake #1: "I made a typo in my file, but I haven't committed yet."
- Solution: Just discard the changes from your lab table.
hug w discard hello.txt(Working directory Discard)
Mistake #2: "I just made a commit, but it was wrong!"
- Solution: Tell your lab assistant to roll back the timeline by one step, but leave all your files on the lab table so you can fix them.
hug h back(HEAD Back)
Next Steps
You now know the essential commands to safely manage your code with Hug. You can build entire projects with just this workflow!
When you feel more confident, you can explore more powerful features in our Practical Workflows guide or find solutions to specific problems in the Cookbook.